Geology Word of the Week: D is for Dredge

A dredge, Indian Ocean, Summer 2007.

def. dredge:
1. (verb, definition 1) Removing sediments or other material from one area and depositing them in another area, usually done in a lake or other body of water. For example, harbors and canals are often dredged to removed accumulated sediments so that the water remains deep enough for ships to pass safely.
2. (verb, definition 2) Searching for something lost or valuable by combing- so to speak- the bottom of a body of water. I think I most often hear this usage on shows such as “CSI” and “Bones.” The detectives say something like, “We are going to dredge the lake/pond/entire ocean to look for the rest of the body.”
3. (noun, marine geology) A tool used to collect geological samples from the seafloor. Dredges used to obtain rocks from the seafloor generally consist of a metal net attached to square metal shovel that scrapes rocks into the net. The dredge is attached to a ship with a cable and dragged along the seafloor. After dragging a dredge along the seafloor for a period of time or a certain distance, the dredge is hauled back up to the ship by the cable. When the dredge is successful, the metal net will be filled with rocks.

Marine geologists have a daunting task: their job is to learn more about the geology of the seafloor. Land-based geology is challenging enough. Rock layers are eroded, folded, faulted, and covered by alluvium, vegetation, & each other. Rocks can be altered, partially melted, and re-worked into a sedimentary rock. Reconstructing the history of rocks and rock layers is a complex process. However, at least on land you can walk around with your trusty geology tools such as a map, Brunton compass, and GPS unit and do your best to untangle the complex history. You just need your hiking boots, some camping equipment, and perhaps a rugged 4×4.

Unfortunately, you can’t just go and walk the seafloor with your Brunton compass. This is because the seafloor is generally covered by several kilometers of water. To study the geology of the seafloor, you generally need a research ship and some equipment that allows you to observe and sample the seafloor. This makes marine geology challenging. However, since about 70% of our planet’s surface is covered by ocean crust (and ocean), study of marine rocks is important.

In many ways, marine geology is simpler than land-based geology. One reason is the oldest seafloor rocks are only ~200 million years old whereas the oldest continental rocks are more than 4 billion years old. This is because the seafloor acts sort of like a giant conveyor belt. New ocean crust is continually being generated at mid-ocean ridges, which are places where oceanic plates diverge and melts are generated as mantle material rises and decompresses. As new ocean crust is formed at mid-ocean ridges, the older material moves slowly but steadily along the conveyor belt away from the ridge towards the edge of the ocean basin. If an ocean basin is young (such as the Atlantic), the ocean basin may still be opening to accommodate new crust. However, in older ocean basins one or more sides of the ocean have generally developed subduction zones, which are places where ocean crust (which is denser than continental crust) is pushed underneath continental crust and back into Earth’s mantle, where it melts and is recycled. Because of this subduction, you do not find very old rocks on the seafloor. Rarely, small segments of oceanic crust are overthrust on a continent edge and preserved. However, the vast majority of ocean crust exists ephemerally (well, on geologic scales anyway) and quickly returns to its mantle maker.

Oceanic crust is also more uniform in composition than continental crust and, since it is younger and moves steadily along the conveyor belt, generally has a less-complicated history than continental crust.

However, there is still the problem that a marine geologist’s field sites are usually located deep underwater. You need a research ship, which is expensive and requires waiting for a slot on a schedule since there are only a few scientific research ships. Then, you need some equipment that allows you to study the seafloor. Most research ships come equipped with basic instruments such as multibeam bathymetry, which allows you to map the seafloor, and a gravimeter, which measures gravity. Depending on the goals of your science, however, you generally need to arrange for additional equipment to allow you to study the seafloor.

One of the coolest tools we have for studying seafloor geology (and biology and chemistry) is deep-sea submersibles such as Alvin. These submersibles allow scientists to descend to the bottom of the seafloor and actually see- albeit through tiny portholes- the seafloor. These submersibles have arms and other attachments that the scientists can manipulate to obtain samples. However, Alvin is very expensive to operate- about $40,000 USD a day. So while it would be great to obtain all geological samples of the seafloor using a submersible so that the exact field relations are known, this is not economically practical.

A cheaper alternative is using a dredge to obtain rocks from the seafloor. Dredging is fairly simple technology- basically, you drag a metal basket along the seafloor and hope that some rocks fall into it. You cannot obtain detailed field relations for your rocks, but you can obtain large quantities of rocks relatively quickly and cheaply with some idea of where they’ve come from.

Dredging is a little more complicated that it sounds. For instance, you can’t dredge just anywhere. Much of the seafloor is covered with thick sediment,  so unless you are dredging at a very young mid-ocean ridge it is important to do careful surveys first. You use multibeam bathymetry and sidescan sonar to look at the seafloor to select locations for dredging.

Where are the best places to dredge for rocks? Generally, steep, sediment-free slopes. You can identify good dredging locations using multibeam bathymetry and sidescan sonar. Multibeam bathymetry uses sound echoing to determine the topography underneath the ship and thus allows you to identify good slopes. Sidescan sonar also uses sound, this time looking at the attenuation of sound on the seafloor. Sidescan sonar returns a black-and-white image. The white, “brighter” parts of the image are places where sound is strongly absorbed. The black, “darker” parts of the image are places where sound is strongly reflected. How is this helpful? Loosely-consolidated sediment (the alluvial crap of the seafloor… often called “marine ooze”) strongly absorbs sound while hard rock strongly reflects sounds. So, you want to dredge along a fairly steep slope that returns a dark sidescan sonar image.

Side-by-side multibeam bathymetry and sidescan sonar, Indian Ocean, Summer 2007.

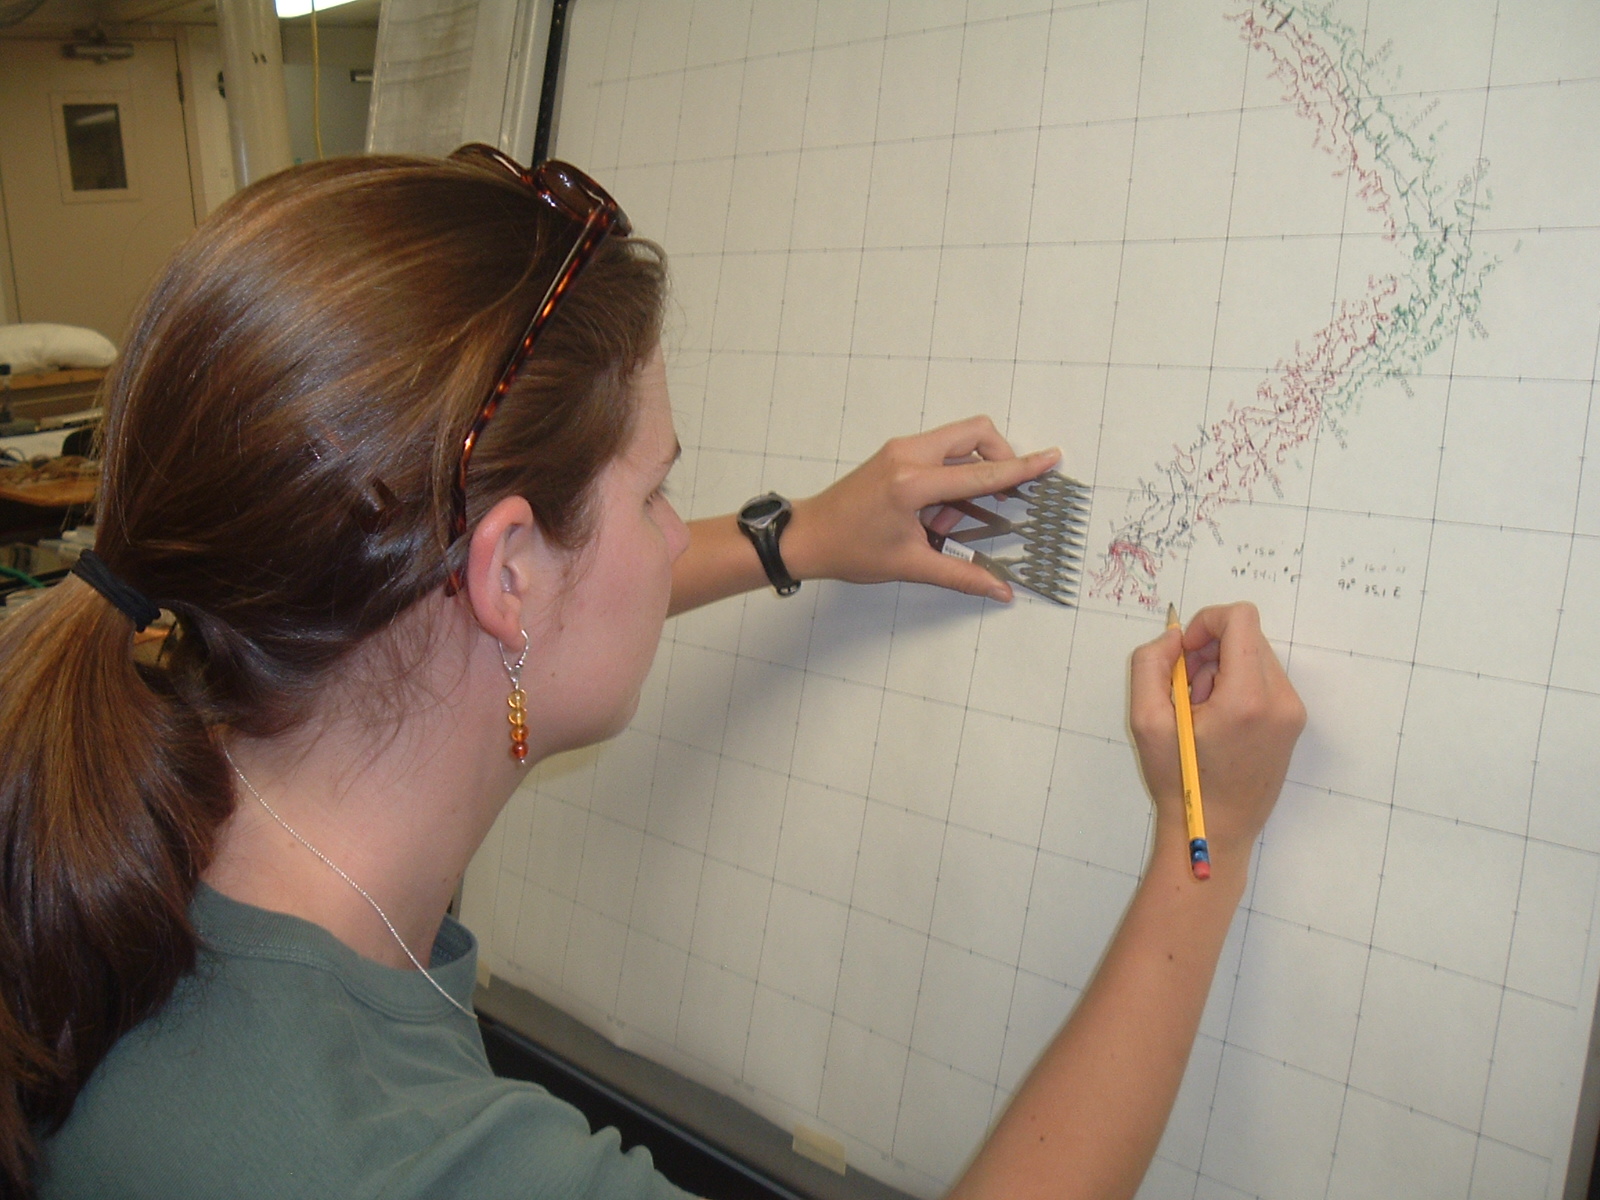
You also want to map out a track for the ship to follow as it drags the dredge along the seafloor.
You want a track that is long enough to catch some rocks, but not too long. If your dredge track is too long, then you end up sampling a large area of the seafloor and it’s difficult to pinpoint where your samples have come from. Of course, with dredging there is always the possibility that you are picking up a loose rock that has rolled downhill from somewhere else. You need to make sure you understand not only the topgraphy of the area you are dredging but also some of the surrounding topography.

Mapping out a dredge track, Indian Ocean, Summer 2007.

When you’ve found a good dredging location, you hook up the dredge to a long, very strong cable which hangs from the ship’s A-frame.

 
Readying the dredge, Indian Ocean, Summer 2007.
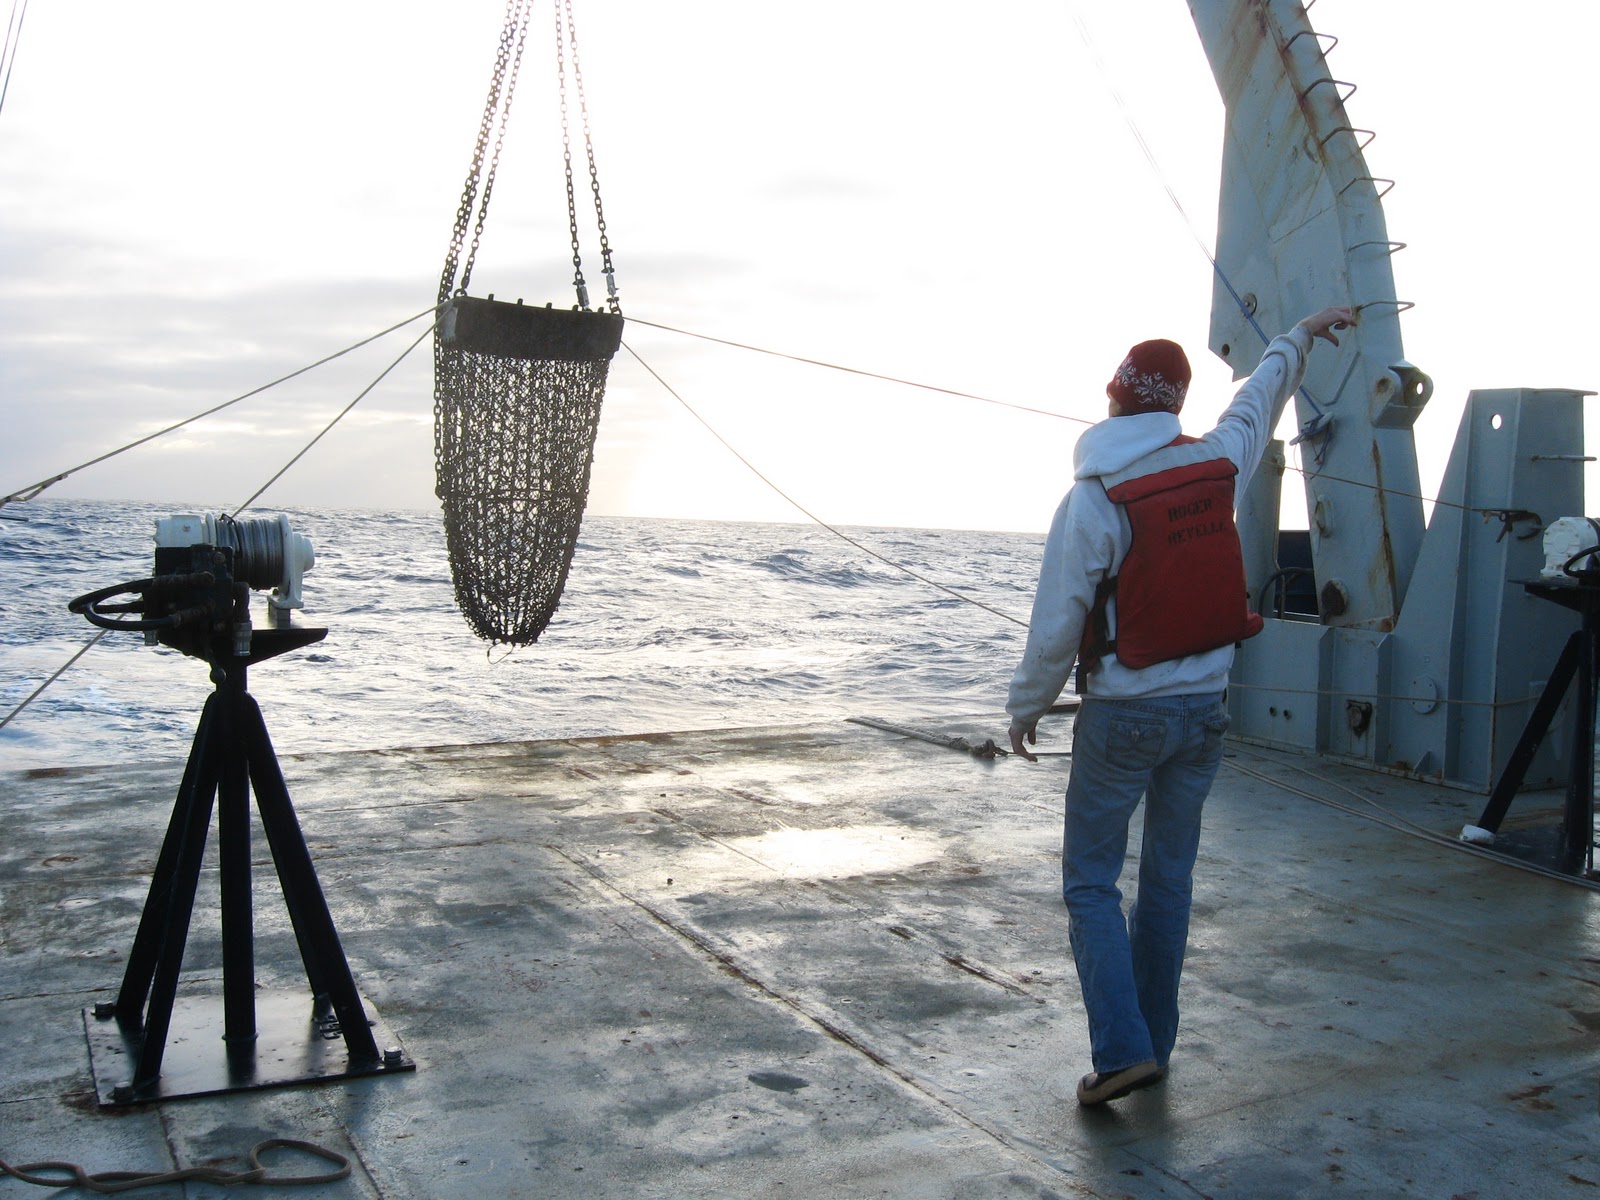
Once the dredge is attached, you lower it slowly into the ocean until it reaches the bottom.
Lowering the dredge 1, Indian Ocean, Summer 2007.
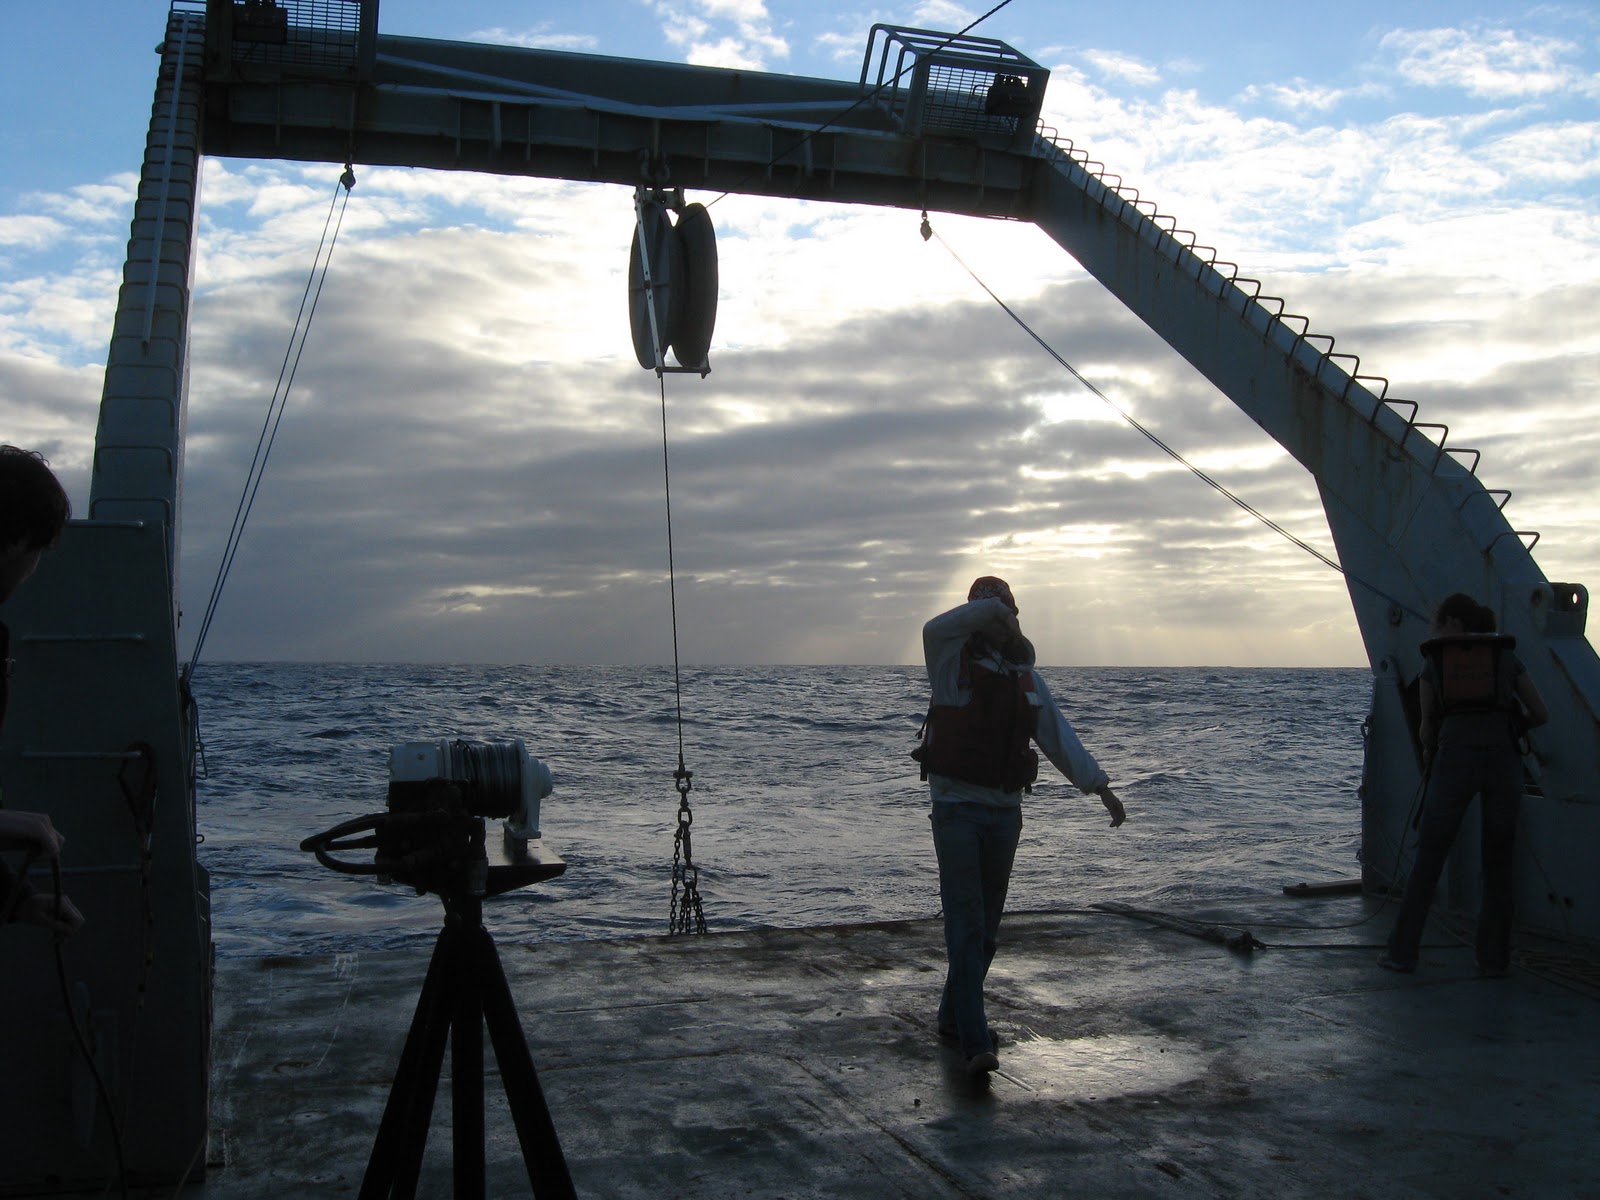
Lowering the dredge 2, Indian Ocean, Summer 2007.
Lowering the dredge 3, Indian Ocean, Summer 2007.

Until the dredge has been completely lowered, it is important to keep it steady with ropes. As the ship moves, the dredge can easily swing and injure someone. Conditions for dredging are sometimes a bit rough. When the sea is too rough, dredging is impossible as it is too dangerous for the ship to have to keep in a steady position. Rarely, the dredge can become snagged and stuck on the seafloor. This can be very dangerous as it acts like an anchor, tethering the ship in place. Dredges are sometimes lost- the metal net often breaks, and sometimes the dredge is lost completely. Usually, several dredges are kept on hand in case one or two are lost to sea.

Keeping lines secure as dredge is moved, Indian Ocean, Summer 2007.

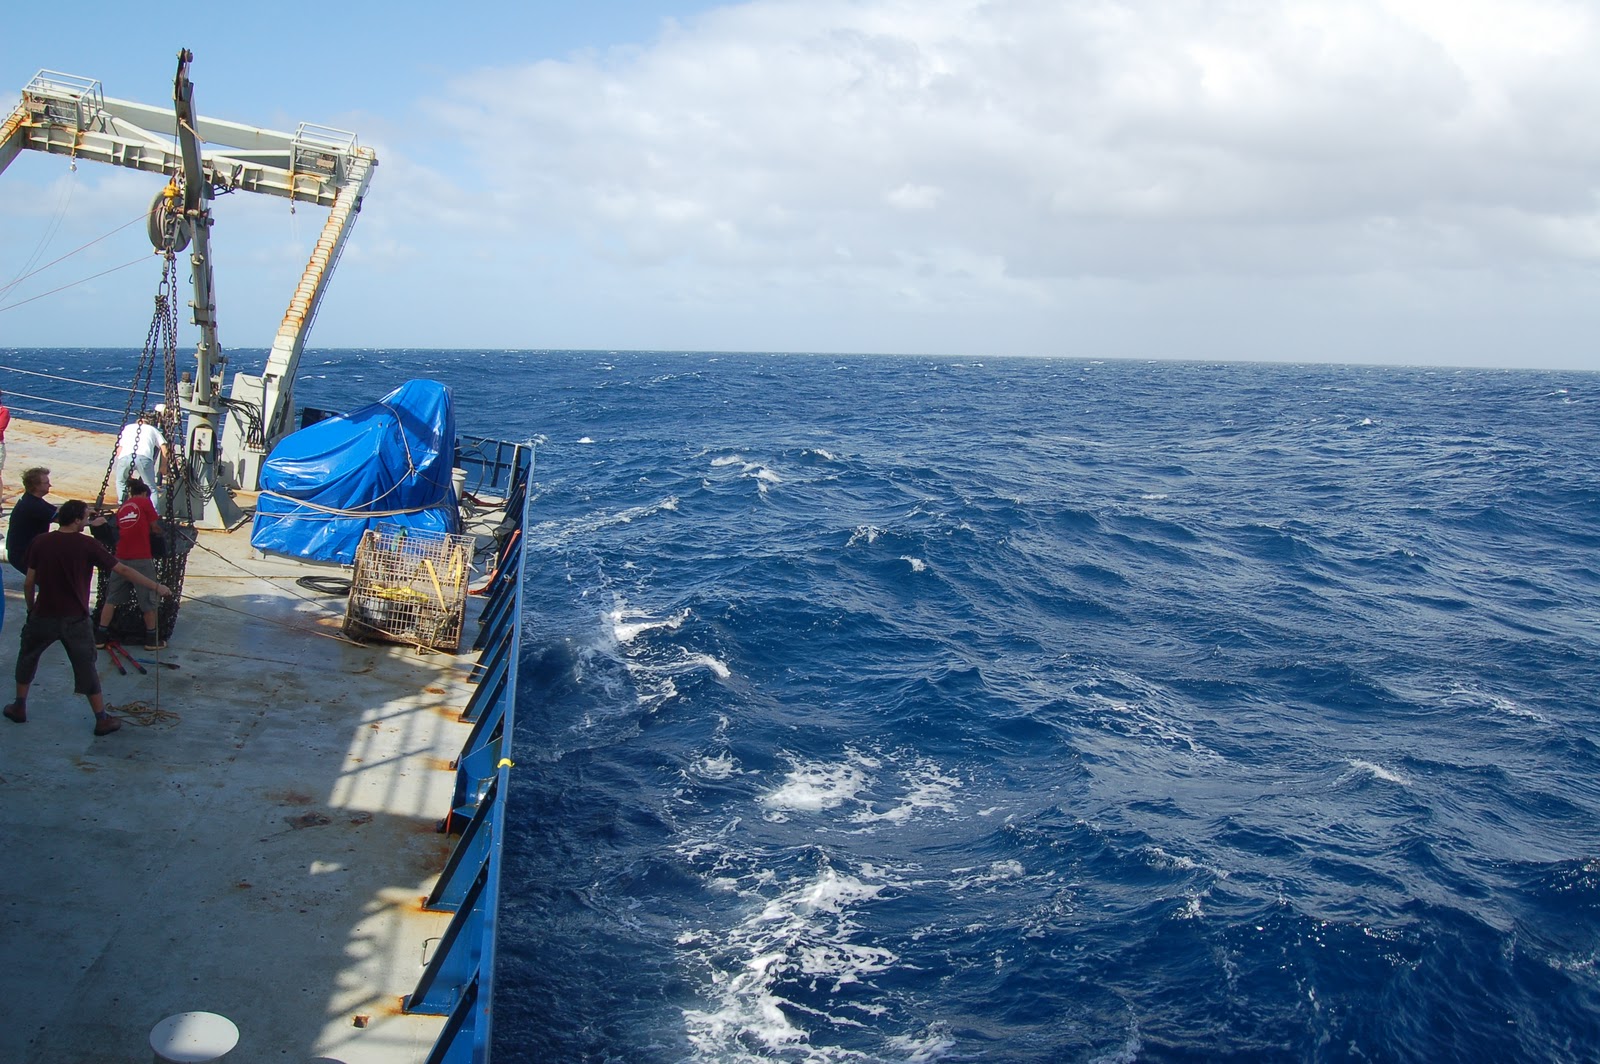
After the dredge has been lowered a ways, you attach a device called a pinger to the cable. The pinger makes noises (pings!) that the ship receives and which can be used to determine the depth of the dredge.

Pinger attached to dredge cable, Indian Ocean, Summer 2007.

Then, you go inside and wait for the dredge to reach the ocean bottom, which can take an hour or several hours depending on the depth of the dredge. You have to watch the dredge at all times, moving it up and down with the topography and keeping it from snagging. A skilled dredge-expert is usually hired for this task and is aided by the research scientists.

Anxiously monitoring the dredge. The inside ship rooms can be quite cold! Indian Ocean, Summer 2007.
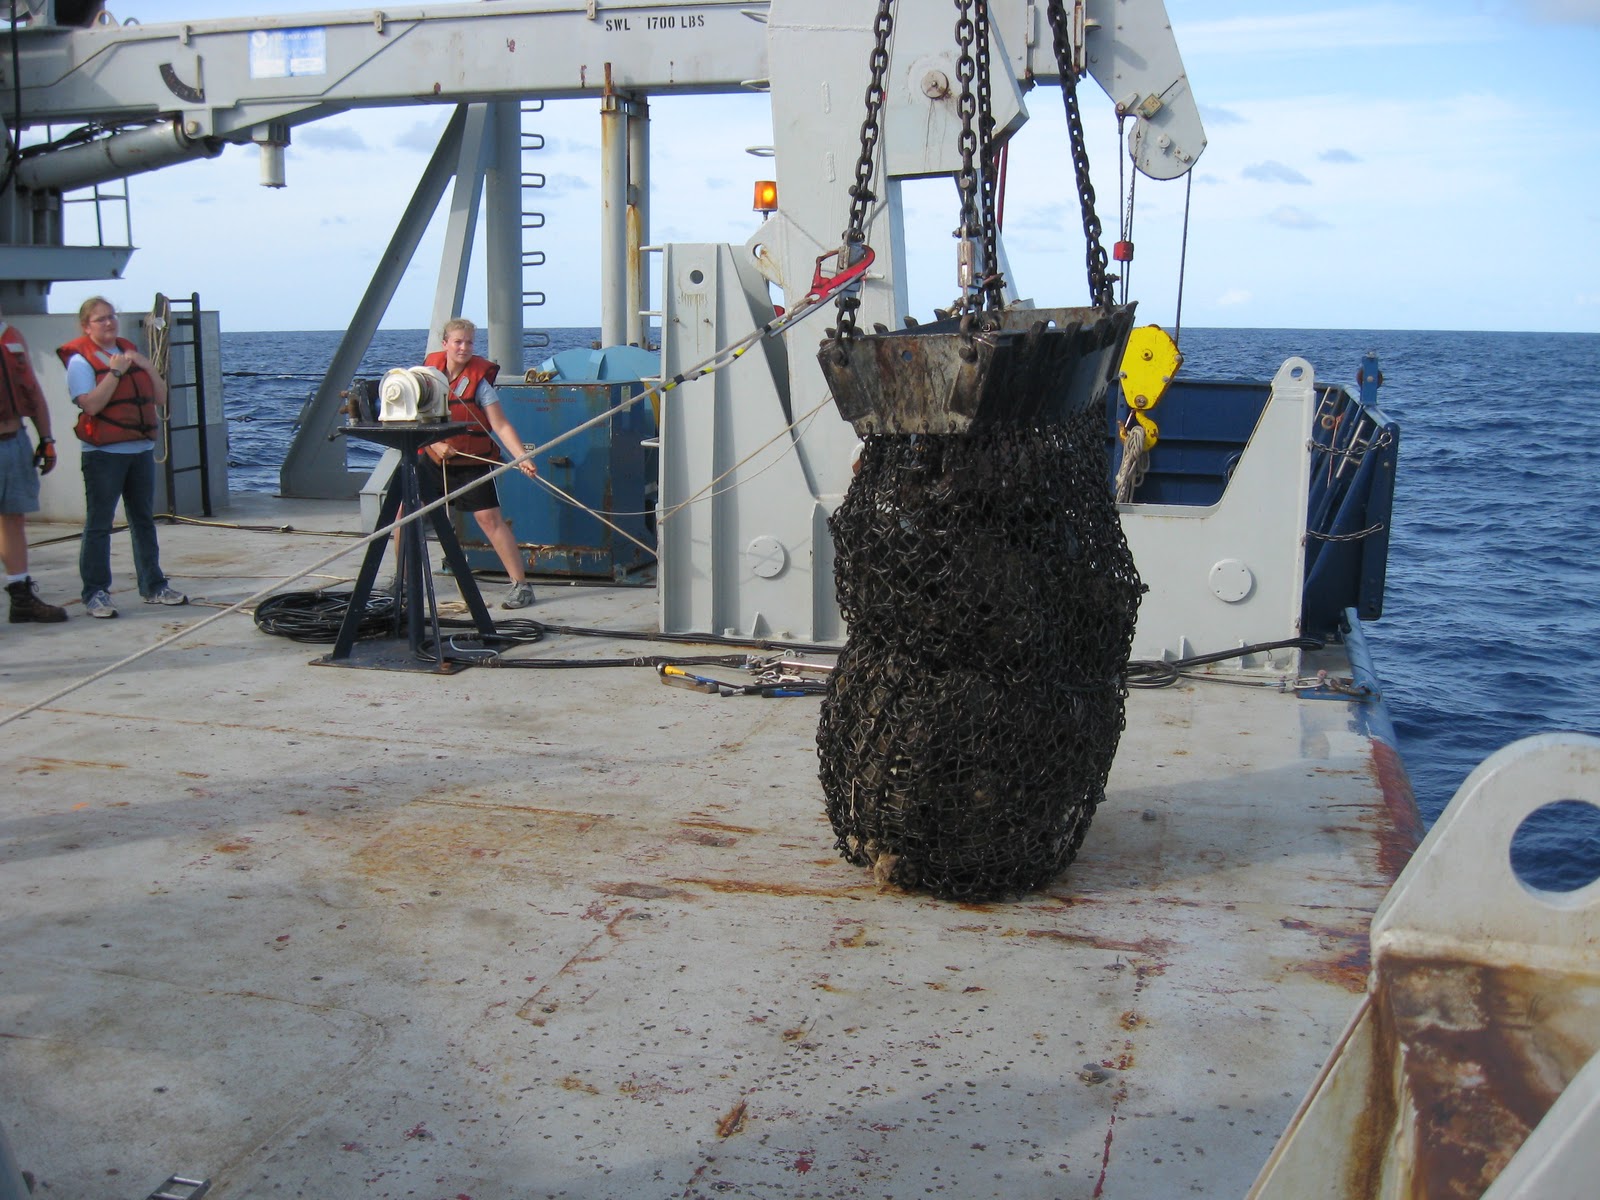
Eventually, the dredge is hauled back up to the ship. Sometimes, there is nothing in the dredge basket. Sometimes, you only end up with “marine alluvium” crap. However, when you’re lucky your retrieved dredge basket looks like this:
Full dredge basket, Indian Ocean, Summer 2007.
 An appropriate response to a full dredge basket is this:
Caught some rocks, Indian Ocean, Summer 2007.
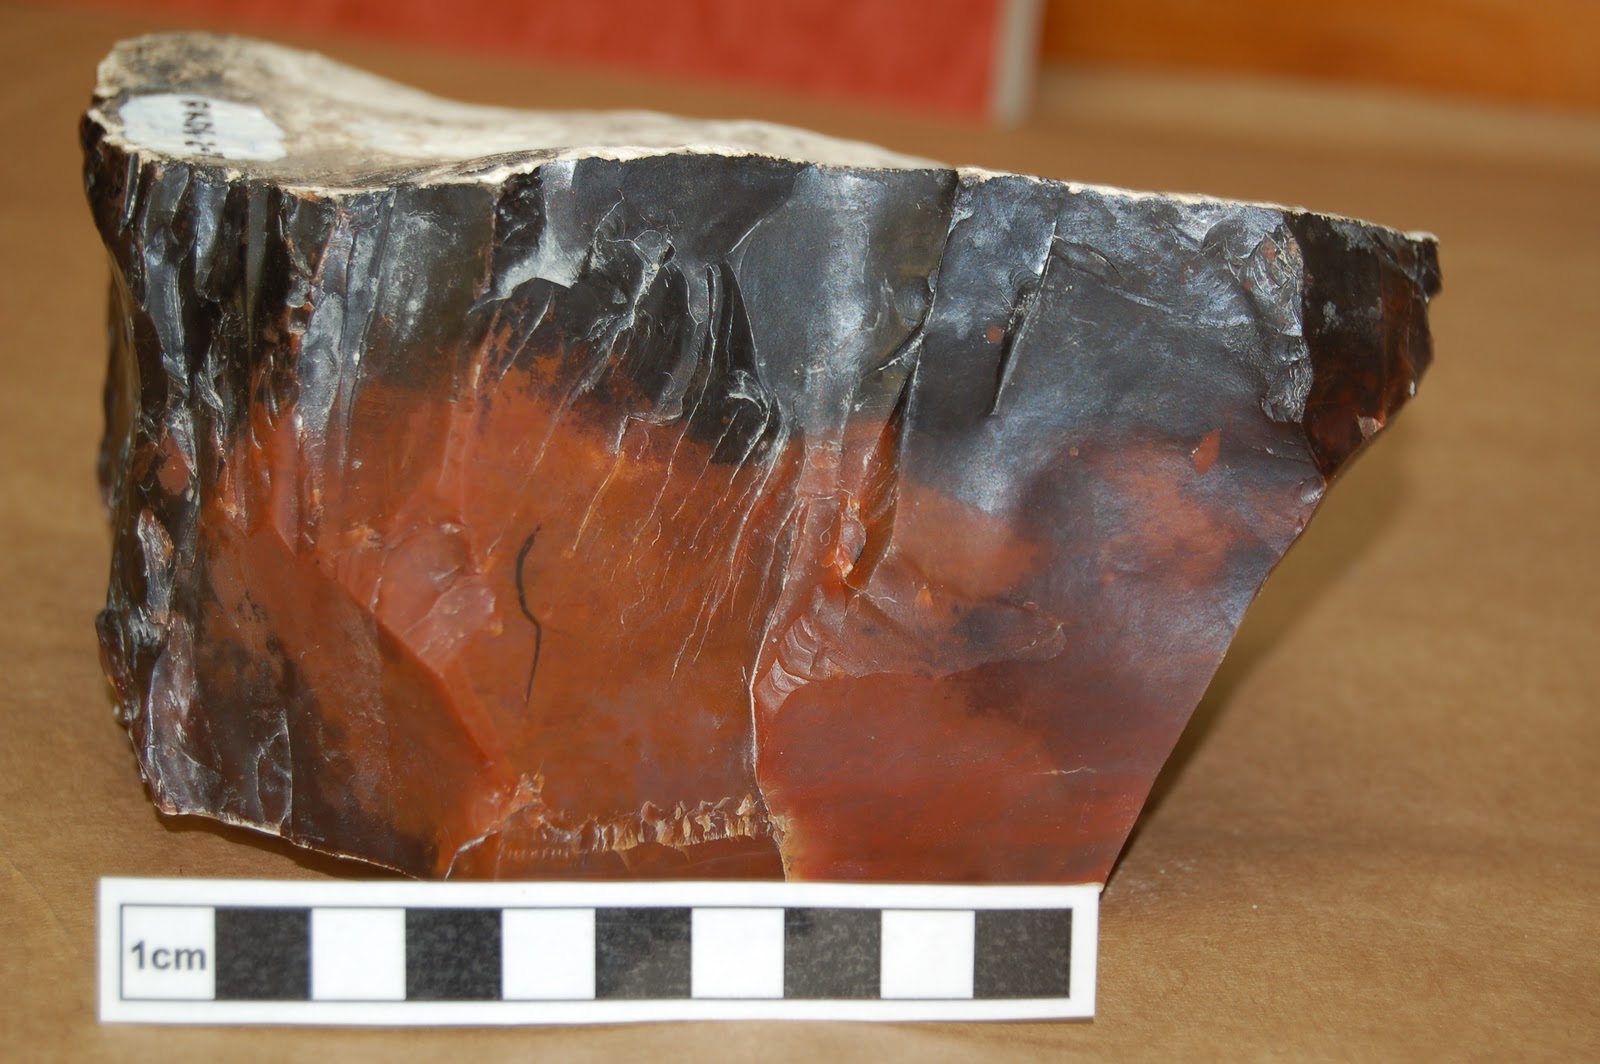
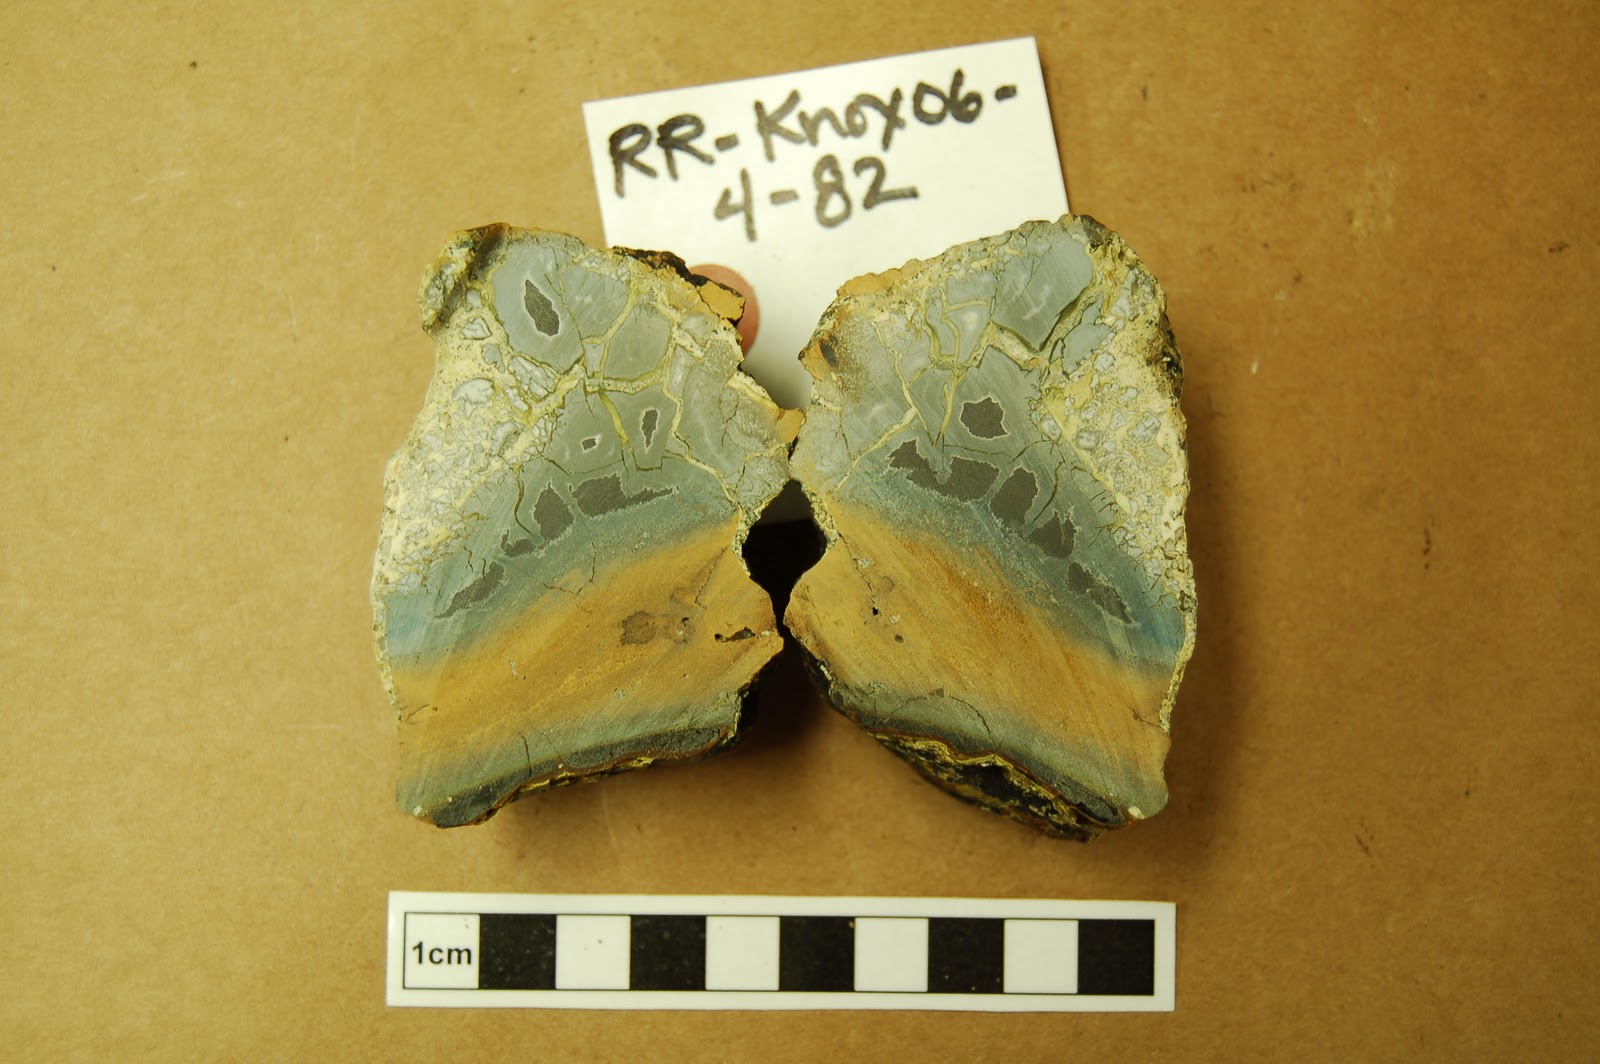
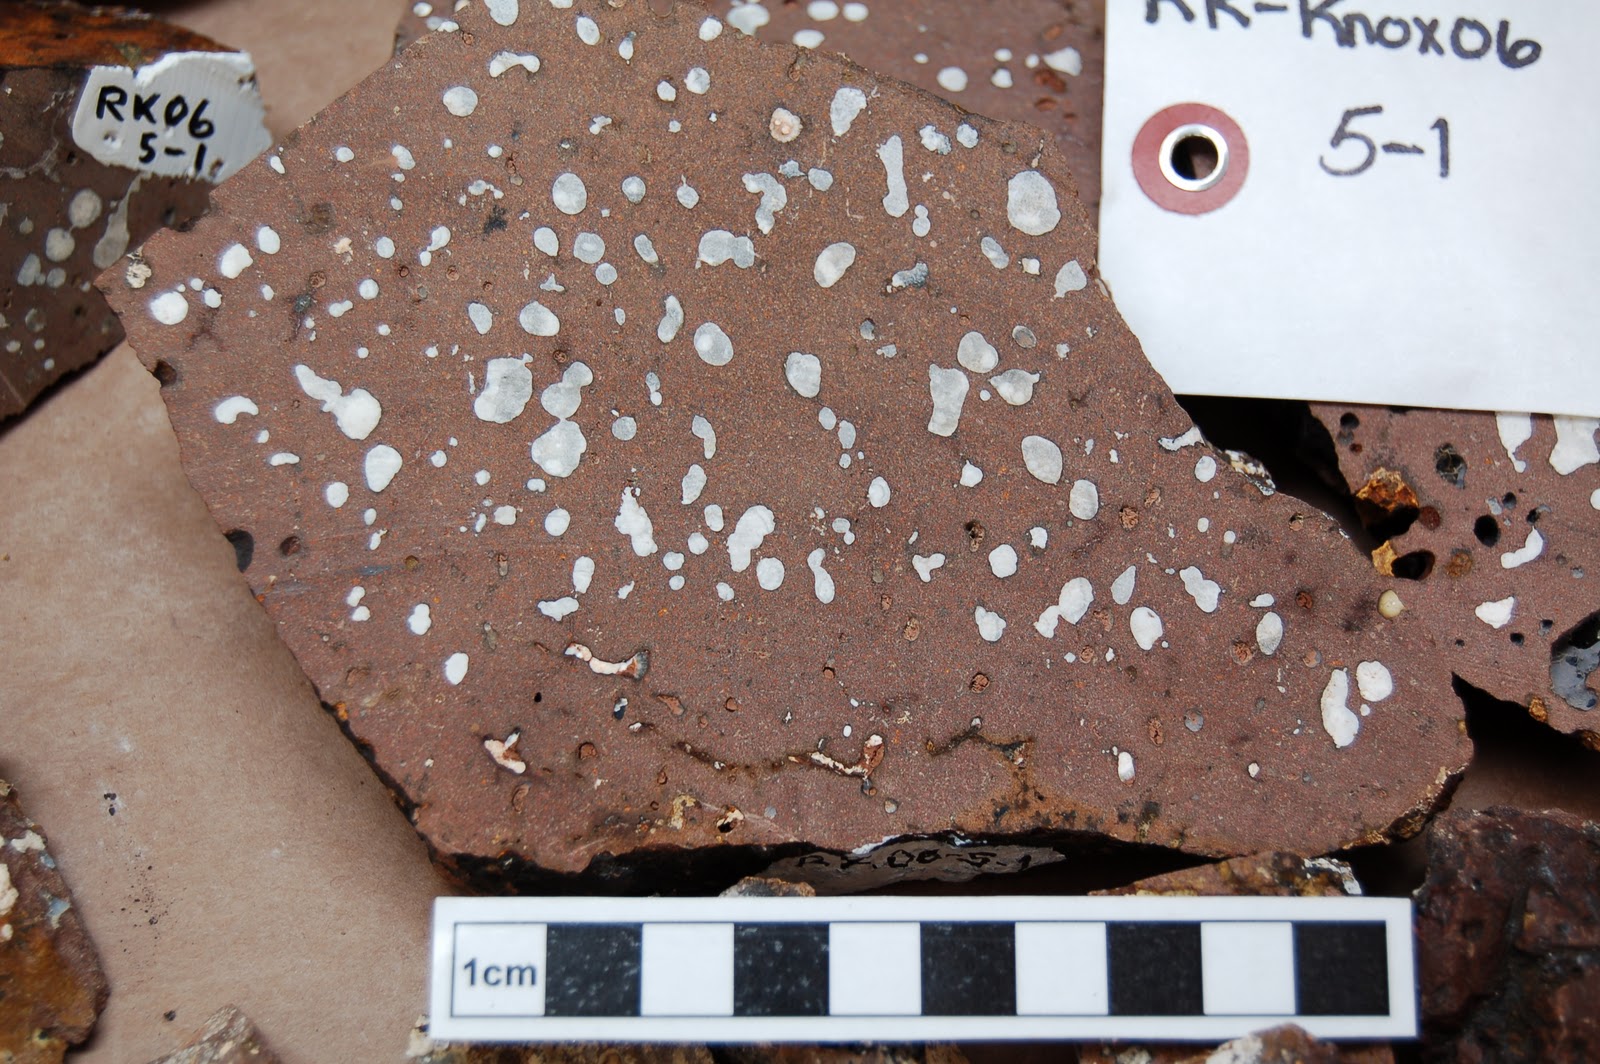
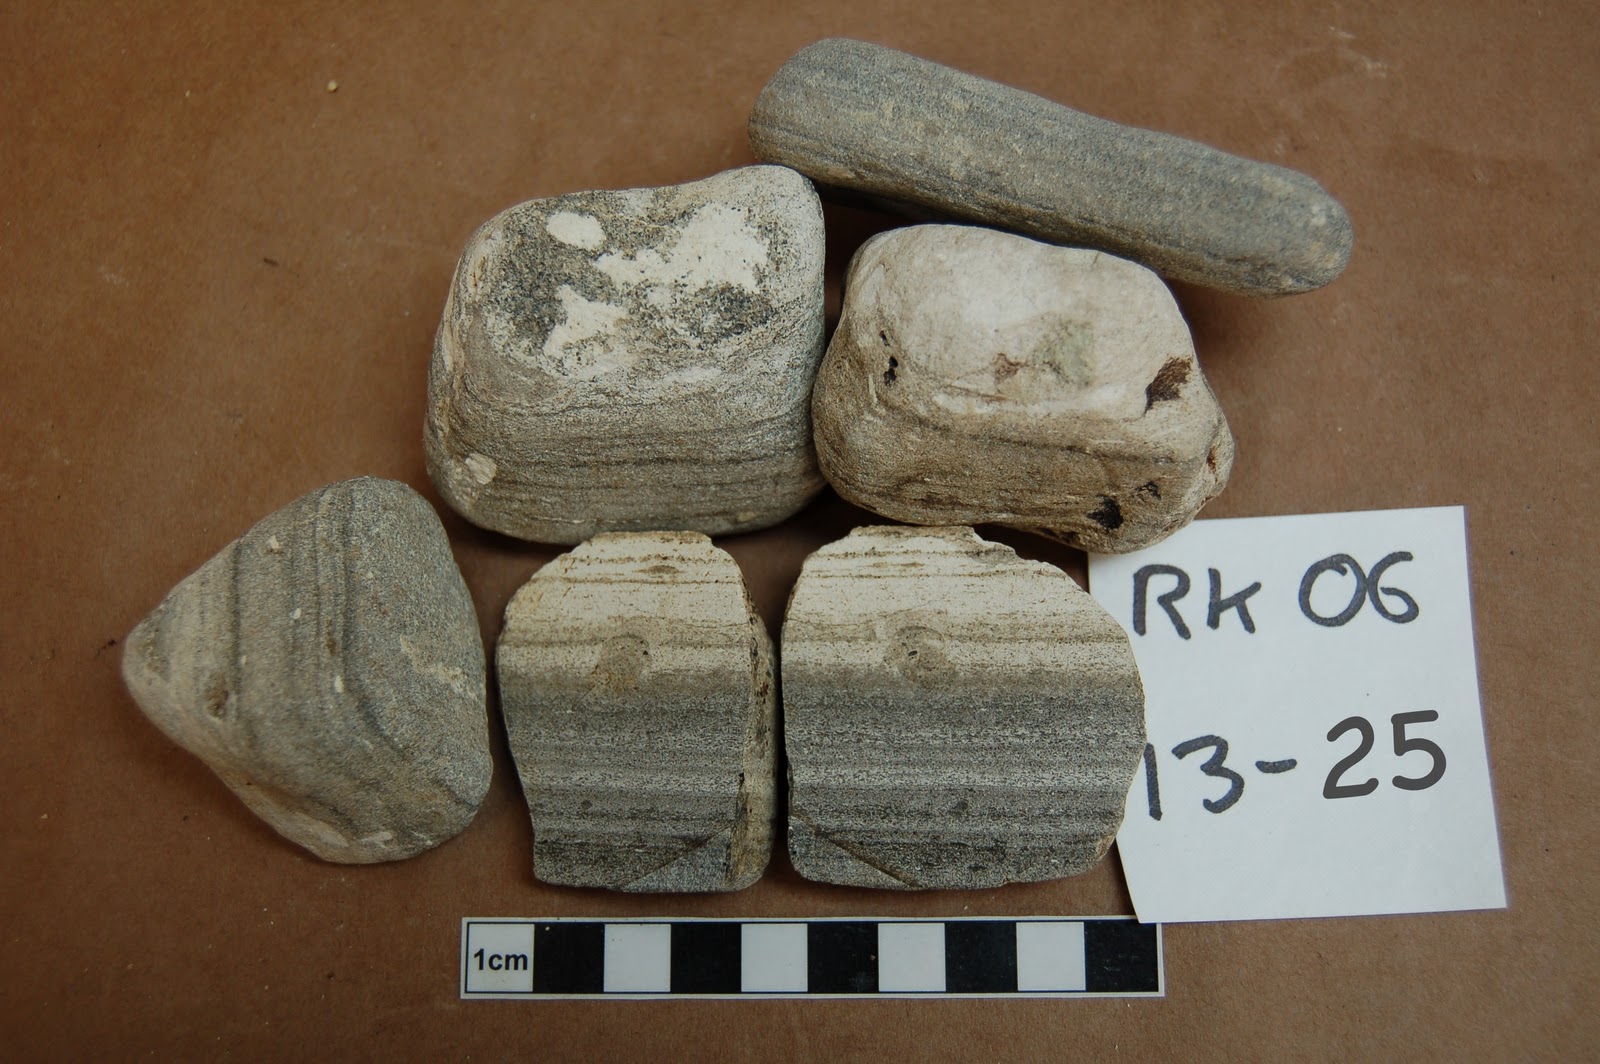
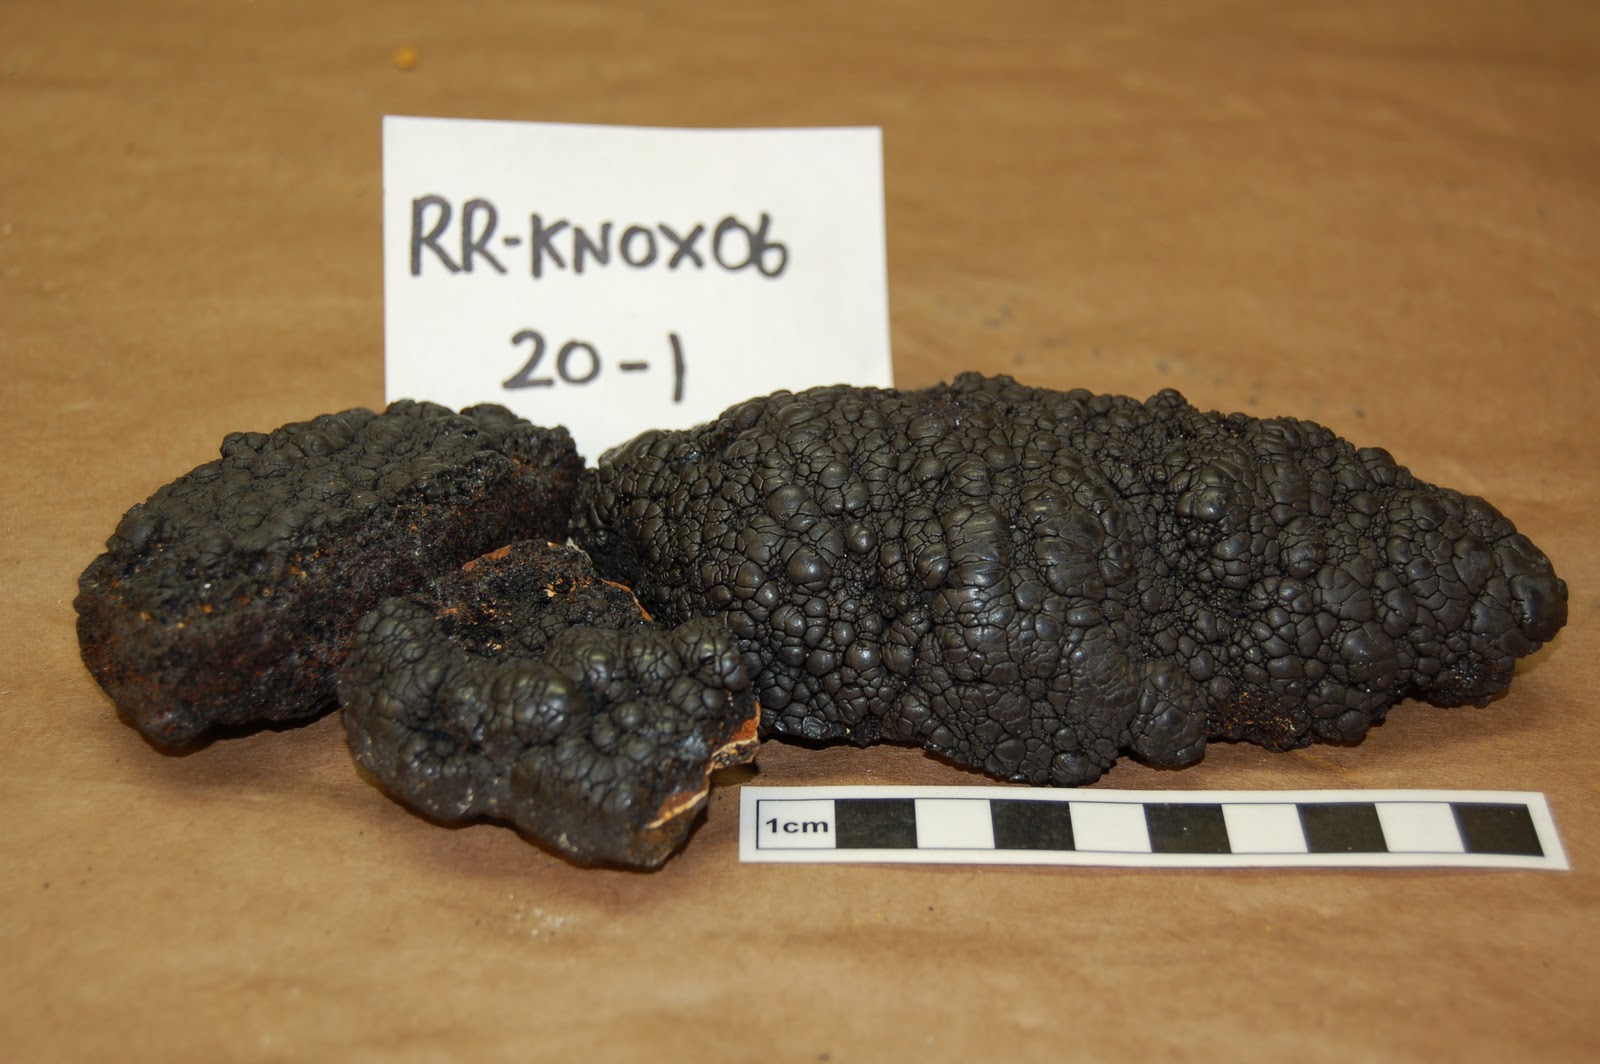
Dredged seafloor rocks generally have thick weathering rims and may also be covered with black iron-manganese crusts. However, once you break or cut these rocks open they can actually be very beautiful… rare treasures dredged from the sea.
A rock with a thick iron-manganese rind, Indian Ocean, Summer 2007.
Typical weathered seafloor basalts, Indian Ocean, Summer 2007.
Chert, Indian Ocean, Summer 2007.
Brecciated basalt, Indian Ocean, Summer 2007.
Basalt breccia, Indian Ocean, Summer 2007.
Vesicular basalt, Indian Ocean, Summer 2007.
Sedimentary marl, Indian Ocean, Summer 2007.
Pink phosphate vein, Indian Ocean, Summer 2007.
Botryoidal (grape-like) manganese crust, Indian Ocean, Summer 2007.
By the way, all of the pictures in this blog post are ones that I took when I was a student geologist on an expedition to study the Ninetyeast Ridge in the Indian Ocean. There is a great website that was put together about the expedition: Sea90E.
Many of the scientists and crew involved in this expedition wrote articles about their research and the day-to-day operations of the ship. I especially recommend the following articles:

Dredging Operations Aboard the R/V Revelle

What is Bathymetry?

Acoustics: Substitute for Superman Vision?

Rocks rock!

Geology Word of the Week: C is for Coprolite

A coprolite. Image courtesy of USGS, taken from Wikipedia commons.

def. Coprolite:
1. Fossilized animal dung. That’s right, rock solid animal poop.
2. Something I occasionally find under the sofa next to my cats’ litter box. Thanks, Samira and Zayna, you little furballs.

I have actually never seen a genuine coprolite. The “cat coprolites” I sometimes find are not true fossils- they’re dried out, but their structure hasn’t been replaced with silicates and calcium carbonates. I would like to see a real coprolite, or several. If anyone knows of a good museum displaying these, let me know, and I’ll try to plan a vacation there at some point. That’s right, I will include “go see fossilized poop” on my vacation agenda. Why? Because coprolites are pretty cool, when you think about it. I find it amazing that poop can become fossilized and that, millions of years later, geologists can recognize fossilized poop and learn things from it.

Coprolites are one of many trace fossils. A trace fossil is a fossil which does not preserve the animal itself (well, unless you count poop as part of the animal…) but rather preserves traces of animal life.  Other types of trace fossils are footprints, burrows, borings, feeding traces, and resting traces. Coprolites and other bromalites (see below) are important because from these fossils we can learn about the bodily processes of ancient animals and humans. Millions of years ago, animals and humans were just as gross as they are today: they pooped, peed, and vomited. In lucky cases where these bodily excretions were fossilized, we can learn much about the biology of ancient organisms- what they ate, where they ate, where they peed, where they pooped, and so on.

Here are a few other awesomely gross trace fossil words:

Bromalite: a general term used to describe any kind of fossilized remains from the digestive system of an animal or human.

Urolite: trace fossil preserving erosion caused by peeing. Did you know that dinosaurs peed?

Paleofeces: fossilized human (distinguished from animal) poop.

Regurgitalite: fossilized vomit or other regurgitated material (such as stones to aid digestion).

Cololite: fossilized intestinal contents.

Gastrolite: fossilized stomach contents.

And, here are my two little coprolite producers:

Samira.
Zayna.

Geology Word of the Week: B is for (Volcanic) Bomb

Fiesty Arenal Volcano, Costa Rica, June 2008.

This week’s geology word of the week is actually a phrase: volcanic bomb.

def. Volcanic Bomb:
A rock that forms when lava is thrown up into the air and cools very quickly. Volcanic bombs have characteristic shapes that they take on when they turn and twist in the air as they cool. They are often tear-drop shaped with a long tail. To be called a bomb, the tephra (another potential word of the week… this basically refers to material ejected by a volcano) must be greater than 64 mm in diameter. Tephra 2-64 mm in diameter is called volcanic lapilli while tephra smaller than 2mm is called volcanic ash.

Here are some links to some beautiful pictures of volcanic bombs:
Bomb #1

Bomb #2

Many more bombs!

I am posting links above because in this blog I want to make an effort not to steal photos off the internet. I want to give credit where credit is due. Unfortunately, I don’t have a good picture of a volcanic bomb in my personal collection of geology photographs. I think it’s time to visit some volcanoes…

I am, however, the proud owner of a volcanic bomb which I picked up from a volcano in California near Mono Lake. I acquired this rock during a geology field trip I went on as an undergraduate. After the field trip, I brought this rock to my parents’ house. My mom wouldn’t let me bring such a large rock inside the house, so I put it in my mother’s flower garden, where it still sits (next to some delightful pegmatite samples), certain to confuse future generations of geologists who will wonder where there are volcanoes in New Hampshire.

I was not the only one to pick up a volcanic bomb during this trip to California. We actually collected several, and we wrapped them in sleeping bags and put them in plastic coolers so that we could transport them back to New Hampshire safely. Just to make the coolers look as sketchy as possible for the TSA folks, we wrapped duct tape randomly around the coolers to keep them closed.

Here’s some advice (for a certain geology professor and everyone else): when transporting volcanic bombs via air travel DO NOT refer to the rocks as volcanic bombs. In fact, I’d go so far as to say that the words “volcanic” and “bomb” should never be uttered within an airport and certainly not in combination.

Here’s a (somewhat stylized through tricks of memory and artistic license) conversation that almost landed the entire geology field trip in a questioning room at the Las Vegas Airport:
**********
TSA official: What’s in the coolers?

Naive geology professor: Oh, those are our volcanic bombs!

TSA official: Your WHAT?

Naive geology professor: Volcanic bombs. They’re great examples, very large bombs… that’s why the coolers are so heavy.

TSA official: Sir, I need to see your passport please.

Quick-thinking geology student: What Prof. Naive meant to say is that these are scientific rock samples from X volcano in California. We’re going to take them back to our college so that we can use these specimens as classroom examples. Would you like me to show you the samples? They are really beautiful rocks.

TSA official: Beautiful rocks? You mean these coolers are full of rocks?

Naive geology professor: Yes! Beautiful examples of volcanic bom–

Quick-thinking geology student: Yes, rocks. We’re geologists. We’ve wrapped the rocks in sleeping bags so that they don’t break. If they break it would ruin some really great scientific samples for very important scientific research.

TSA official: You’re worried about the rocks breaking? So you wrapped them in sleeping bags?

Naive geology professor: And duct tape! So many uses for duct tape. I hope you don’t want to see the bombs because the duct tape is hard to–

Second quick-thinking geology student: I’d be happy to open the cooler, sir. Let me just get the tape off…

TSA official: Okay, I’d like your group to step aside. We’re going to have to hand search all your luggage.

First quick-thinking geology student (Muttered under breath to second quick-thinking geology student): Don’t let Prof. Naive say anything else… ask him a question about crystallization phases or something…
**********
Well, we did make it through security eventually and didn’t miss our flight. Again, let me repeat: do not use the phrase “volcanic bomb” in the airport. Fortunately, this incident happened several years ago before security became so crazy. I think today we would end up in the questioning room for sure.

That’s the word for this week… stay tuned for more geological tidbits! I’ll be back in a few days!

Geology Word of the Week: A is for Alluvium

 A geology student on some alluvium, Western USA, Fall 2005.

def. Alluvium:
1. Loosely-consolidated sediment transported or re-worked by freshwater.
2. What you put down on a geologic map when loose crap is covering up interesting rocks.
3. Very interesting sediment with key climate information that will save the world from global warming and/or help the world grow more food. (In Quaternary science only).
I think that I learned the word “alluvium” during my first mapping exercise as part of my undergraduate geology field camp. I learned that “alluvium” or more specifically “Quaternary Alluvium” is what you sketch on your geologic map when recently-deposited, poorly-consilated, partly re-worked by water soil and sediment (*cough* crap *ahem*) is covering up the consolidated geological layers of rock (limestone, sandstone, granite, whatever it may be) that you are trying to map.This recent alluvium (deposited in the last ~2.5 million years or in the Quaternary) hasn’t had enough time to consolidate into a sedimentary rock.

It can be frustrating to encounter alluvium at a key contact. Geological mapping is, when you think about it, a little bit crazy. I still remember the teaching assistant telling me to “guess” where I thought a particular contact lay underneath a wide expanse of alluvium. Guessing is, to an extent, acceptable in geology. As a novice geologist, I found the tolerance for guesswork remarkable– when you make a geologic map, you take measurements wherever you can see a particular rock layer and wherever you can’t see it– where it’s obscured by other layers or alluvium– it’s okay to guess where you think it may be. You can even make reconstructive geologic maps where you draw where layers used to be before they were eroded!

As a geologist, I suppose that I have become good at “thinking below the alluvium” or guessing. I am not afraid to make an educated guess. You have to in geology. You take what evidence you have– a small outcrop sticking out of the alluvium or that annoying biological cover; a sliver of a deep layer exposed in a fault; a diamond from the deep; a single, enduring zircon grain that’s survived 4 billion years; whatever you have– and you do your best at interpreting the geology. In academia, you guess the best you can and the different flavors of guess can lead to decades of back-and-forth discussion. In industry, you guess and the difference between a good guess and a bad guess can be millions of dollars. You guess where to drill for oil, where to mine for diamonds, where to prospect for gold. You are often wrong. If you are wrong too often, you are fired. To survive, you have to become good at guessing. You have to accept that guesswork has a place in science. You have to learn to guess as scientifically and accurately as possible.

I suppose that “thinking below the alluvium” is an example of where intuition and art, even, enters science. Experienced geologists and those with a natural intuition are better at guessing, better at figuring out where a layer runs underground or where to drill for oil. Certainly, geologists have many tools and data available to them to help them guess. As we develop our geological toolbox– both geophysical and geochemical tools– we have to guess less. Or we have more ways in which to narrow down our guesses to the most likely guess.

When I was in fieldcamp working on that first mapping exercise, I remember something that our instructor said to a few students (myself included). A few years before, this instructor had been a lecturer at well-respected University X. His first year of teaching at the university he noticed that a large number of financial recruiters made rounds of the geology department, sweeping up recent geology grads for positions in banking and investment. He found this befuddling– many of the geology students who were recruited had never even taken an economics course. When the recruiters returned the next year, he cornered one of them in the hallway and asked why they were recruiting in the geology department. Did they simply recruit from all departments because students at University X were known for being smart?

The recruiter replied that, yes, students from University X were known for being smart but that the geology department was targeted in particular. The instructor asked why this was and the recruiter replied something like this:

“Because geologists are not afraid to make confident decisions based on extremely limited data. This is a very useful skill for finance. We can train new recruits in finance, but it’s difficult to train new recruits to make decisions.”

I have never thought about going into finance (even typing this makes me shudder… I plan to leave day-to-day finances and taxes and investments and such to my soon-to-be husband), but I suppose it is true that some skills translate. There is merit to studying geology– and science in general– because of the ways in which you learn to think. The ways you learn to analyze data and test hypotheses and make decisions. I’d argue that a scientific background of any sort has important skills that translate into other fields. There are many reasons to study science, even if you never intend to become a scientist. Personally, though, I hope that I’m always able to make my way as a geologist. If only because I much prefer jeans and t-shirts to skirts and suits.